The model of cooker i am working on today is a Bush your may differ not a lot i can do about that but mostly of the part will be similar so use this as a guide not as a exact manual for your repair.
So this is a ceramic hob cooker with twin oven the bottom oven has one element and light bulb and is fan assisted.
The upper oven is a grill / oven and has a element that does both but this is a single element version some do have a separate element for both grill and oven use.
So here are some photos of the outside of the cooker i am working on .
Buy cooker and oven spares from Ebay UK here
Buy a good Multimeter here on Ebay UK
Ceramic hob / switch panel and double ovens on front .
Here you can see 2 rear panels that give you access to the inside
of the rear on ovens and access to test elements and other stuff.
This is the top inspection panel removed and you see the wiring the
single element in the upper center and the over limit thermal cut off thermostat
on the silver metal rail on left of photo
close up of wiring connections of the upper oven heating element
it has power connections an earthing point and a thermostat
this is the thermal cut out over limit thermostat
This is the oven with bottom rear access panel removed
the upper left hand component it the light for inside oven
the item on the upper right is another thermal cut out over limit
thermostat. Just below this is the main oven element connections and
in the centre is the main oven fan motor.
Ill photo these close up now .
the oven light with its connections positive and negative and
an earth point for electrical protection.
Cooker oven repair - Whats inside cooker oven and what are the components and parts
close up of the lower oven over limit temperature device
The lower oven main element connections
The oven fan motor and its electrical connections.
Now move onto the upper hob they are all different in the way you get into them and
infact this one is a terrible version as replacing the ceramic elements is very difficult to
realign them correctly .
so i first undo any retaining screws and all are different so cannot help you exactly on your model
best to get the manual .
The underside of the hob unit the metal cover unscrews and the elements are them loseto change but be aware this type are hard to refit as it can take ages to realign the elements correctly.
Quick peak into all the connections there are four elements on this one
and a lot of wires
these are the pins that need aligning on refitting looks easy but it can be
very hard to align them all correctly i Tipex the tips of the and the holes
so i know where they fit.
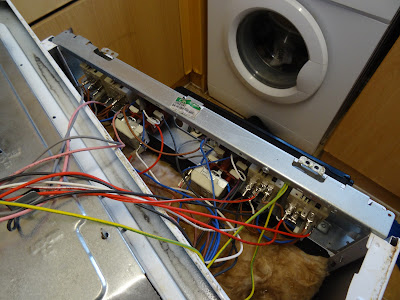
With the hob removed you can now access the switch panel here you can change switches and
or thermostats.
Thermostats and switches , ensure you note and photo the wiring on the one you need
to replace.
you need to remove the screws from the front panel
and lastly the lcd display and timer panel electronics pcb.
see video of all this below


No comments:
Post a Comment